Create DynamicXML Sitemap in Asp.net Core: Here in this article we are going to learn about creating sitemap dynamically in the Asp.net Core application. Every website must have a sitemap, as it's a major part of the SEO world. These sitemaps are submitted to the search engine for better indexing of the website.
Well am not going deep about SEO, let head back to create a sitemap in the asp.net core application.
What is a sitemap?
A sitemap is nothing but a simple XML formatted file, which has the blueprint of your website. It has all the URL and other optional details (image, last updated date) of your website, which helps Google to crawl your website easily.
Output: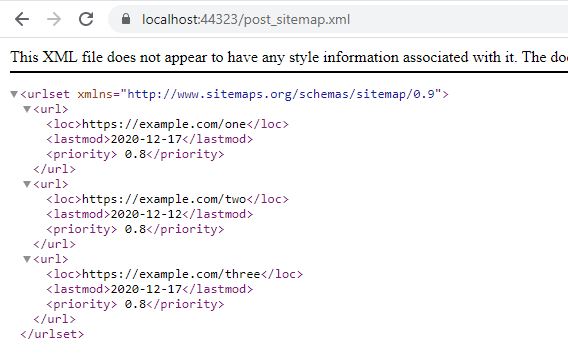
Steps to create sitemap dynamically.
- Create a project with EntityframeworkCore database connectivity.
- Code to generate a sitemap XML string.
- Option to set a friendly URL.
Note: If you were aware of EntityFrameworkCore DB connectivity, then direct jump to Step 2.
#1 Create project EntityframeworkCore database connectivity.
In visual studio, first, we select the Asp.net Core website application from the project template. Then we add a folder named Models, and inside that folder, we add a class file as BlogPost with the following properties.
The BlogPost class represents our database table name with respective columns as their properties.
Project Structure: 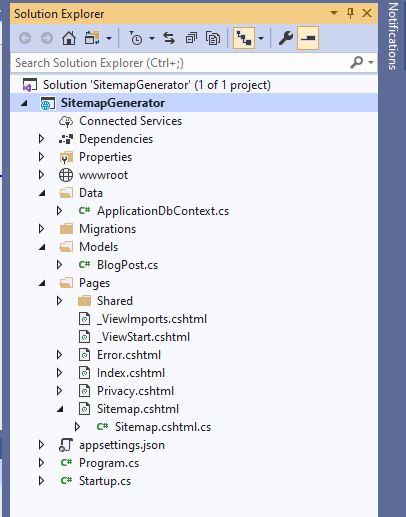
Our BlogPost class file looks like as written below:
public class BlogPost
{
	[Key]
	public int Id { get; set; }
	public string url { get; set; }
	public DateTime CreatedDate { get; set; }
	public DateTime ModifiedDate { get; set; }
	public string Content { get; set; }
}
Note: We need to add a namespace System.ComponentModel.DataAnnotations.
As we are using MySQL database and Entityframeworkcore, so for database connectivity we need to install Database Provider i.e some NuGet packages which are listed below:
Pomelo.EntityFrameworkCore.MySql
Microsoft.EntityFrameworkCore
Microsoft.EntityFrameworkCore.Tools
Once all the packages are installed, go to the appsettings.json file.
Appsettings.json file is nothing but a simple application configuration JSON file used to store configuration settings such as database connection string etc. Here we add a connection string with the values to connect our local MySQL database.
Appsettings.json file looks like as written below:
 {
  "ConnectionStrings": {
    "DefaultConnection": "server=localhost;port=3306;database=dbDemo;uid=root;password=secret"
  },
    "Logging": {
      "LogLevel": {
        "Default": "Information",
        "Microsoft": "Warning",
        "Microsoft.Hosting.Lifetime": "Information"
      }
    },
    "AllowedHosts": "*"
}
Next, we create a new folder named Data, and inside it add a class file name as ApplicationDbContext (which inherits DbContext class).
In the ApplicationDbContext class file, we add properties as DbSet<entity> of our model class i.e (BlogPost), which is mapped by default to the database tables.
Our ApplicationDbContext.cs file code look like as below:
public class ApplicationDbContext : DbContext
{
	public ApplicationDbContext(DbContextOptions<ApplicationDbContext> options): base(options)
	{
	}

	public DbSet<BlogPost> BlogPosts { get; set; }
}
Next, we configure the database connection from the startup.cs file under ConfigureServices method. Code as written below
public void ConfigureServices(IServiceCollection services)
{
   services.AddDbContext<ApplicationDbContext>(
        option => option.UseMySql(Configuration.GetConnectionString("DefaultConnection")));
}
Now we are done with the model, Dbcontext, and respective NuGet installation.
The next step is to create a database and table if not exists using the below command in PMC
Go to Tool --> Nuget Package Manager --> Package Manager Console and type the below command.
add-migration dbInitialThis will generate a migration script and next type update-database command as shown below.
update-databaseIt will create the database, table if not exists. Check your MySQL, add some dummy data into the table blogpost.
#2 Code to generate a sitemap XML string.
A sitemap is a standalone page, so we add a razor page and name it sitemap. On the razor page model, we inject ApplicationDbcontext as we have to work with the database.
Below code will generate XML string and return as ContentResult having ContentType = "application/xml".
Our page model code looks like as written below:
public class SitemapModel : PageModel
{
	public readonly ApplicationDbContext dbContext;
	public SitemapModel(ApplicationDbContext dbContext)
	{
		this.dbContext = dbContext;
	}
	public IActionResult OnGet()
	{
		var blogPost = dbContext.BlogPosts.ToList();
		StringBuilder sb = new StringBuilder();
		sb.Append("<?xml version='1.0' encoding='UTF-8' ?><urlset xmlns = 'http://www.sitemaps.org/schemas/sitemap/0.9'>");

		foreach (var item in blogPost)
		{
			string mDate = item.ModifiedDate.ToString("yyyy-MM-dd");
			sb.Append("<url><loc>" + item.url + "</loc><lastmod>" + mDate + "</lastmod><priority> 0.8</priority></url>");
		}
		sb.Append("</urlset>");

		return new ContentResult
		{
			ContentType = "application/xml",
			Content = sb.ToString(),
			StatusCode = 200
		};
	}
}
Now visit page https://localhost:portno/sitemap it will give output something like as shown below.
OUTPUT:

#3 Option to set a friendly URL.
In asp.net core we have the option to set a friendly URL. For example to display product page sitemap as product.xml or in our case instead of just sitemap we want sitemap.xml or post_sitemap.xml.
By using AddPageRoute we configure a route to a page with a friendly URL. Code as written below:
public void ConfigureServices(IServiceCollection services)
{
	services.AddDbContext<ApplicationDbContext>(
	   option => option.UseMySql(Configuration.GetConnectionString("DefaultConnection")));

	services.AddRazorPages(options =>
	{
		options.Conventions.AddPageRoute("/Sitemap", "Sitemap.xml");
	});
}
Conclusion: Here in this article we were successfully able to create a dynamic sitemap, (XML file) based on our MySql database in the Asp.net core application. Also, we are able to set custom page names i.e friendly URLs using Conventions.AddPageRoute.
Other Resource:
Thank you for reading, pls keep visiting this blog and share this in your network. Also, I would love to hear your opinions down in the comments.
PS: If you found this content valuable and want to thank me? 👳 Buy Me a Coffee
Post Comment
Your email address will not be published. Required fields are marked *