Dropzonejs Asp.net Image resize: In this article, we are going to upload bulk images using Dropzone Js, and resize a picture while uploading in Asp.net C# via jQuery Ajax method. In my previous article have explained how to use dropzone Js in Asp.net C# application .i.e Easy way to upload bulk images using Dropzone.js in C#. DropzoneJS is an open source library that provides drag n drop the files.
This awesome plugin is lightweight and is highly customizable. It supports image previews and shows nice progress bars while uploading images.
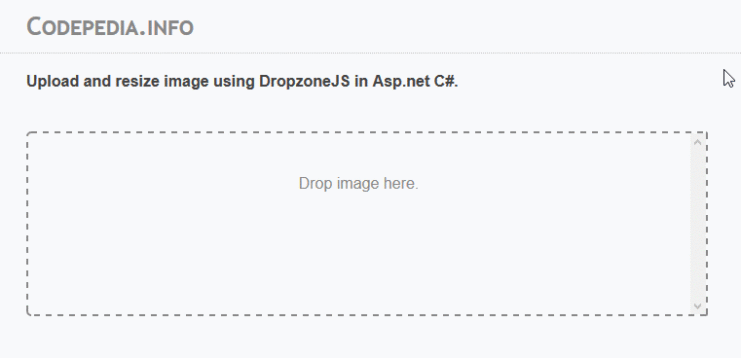
Screenshot:

# Download DropzoneJS files:
Before writing any code, first we will download the dropzone js files .i.e( dropzone.css, dropzone.js ).
You can download the latest version from the DropzoneJs official site or you can download it from my source code.
# HTML MARKUP:
After downloading dropzone js file, we will include it in our Asp.net Web form. Also, we will import the latest jQuery library.
So now our header tag looks like.
<script src="latestJs_1.11/jquery.min.js"></script>
<script src="DropzoneJs_scripts/dropzone.js"></script>
<link href="DropzoneJs_scripts/dropzone.css" rel="stylesheet" />
Now add an HTML div tag, where we are going to drag-drop selected images to get uploaded. Well, dropzone js has an image preview feature which gets automatically displayed when we select any files.
Just add below written piece of code directly in your Web form.
<div id="dZUpload" class="dropzone">
         <div class="dz-default dz-message">
             Drop image here.
         </div>
</div>
# Code-Behind: C# code to save and resize image uploaded by Dropzone Js.
Dropzone does not provide the server side implementation of handling the files. We need to handle it from the server side ( I have provided Dropzone js C# example ).
We will add a Generic Handler (ashx file) into your Asp.net Project. Using generic handler we can achieve following two things.
- Resize uploaded Image with server-side C# code.
- Save the resized image on the server.
Code to Resize image while uploading.
What I will do now, is to resize the image to a particular height. Here in my case, I have set height as 200.
So now we don’t need to worry about image size, whenever the user uploads large images, our program will automatically resize the image with a specific dimension and save it to the server.
Here we write a common method which retrieves two parameters 1st as Image and 2nd as height, and it returns resized image. You can also check simple way to resize an image while uploading in Asp.net C#.
Just copy paste the below-written C# code and use it whenever you need to resize an image.
public static System.Drawing.Image ResizeMyImage(System.Drawing.Image image, int maxHeight)
    {
        var ratio = (double)maxHeight / image.Height;
        var newWidth = (int)(image.Width * ratio);
        var newHeight = (int)(image.Height * ratio);
        var newImage = new Bitmap(newWidth, newHeight);
        using (var g = Graphics.FromImage(newImage))
        {
            g.DrawImage(image, 0, 0, newWidth, newHeight);
        }
        return newImage;
    }
Code to Save resized image uploaded using Dropzone Js.
First, we add these two namespaces in the generic handler (ashx file) as we have to deal with files and data streams.
using System.IO;
using System.Drawing;
Now the below-written code will get the files from dropzonejs, and rename image with a unique name, then save it to the MediaUploader folder.
public void ProcessRequest(HttpContext context)
{
    context.Response.ContentType = "text/plain";

    string dirFullPath = HttpContext.Current.Server.MapPath("~/MediaUploader/");
    string[] files;
    int numFiles;
    files = System.IO.Directory.GetFiles(dirFullPath);
    numFiles = files.Length;
    numFiles = numFiles + 1;

    string str_image = "";

    foreach (string s in context.Request.Files)
    {
        HttpPostedFile file = context.Request.Files[s];
        string fileName = file.FileName;
        string fileExtension = file.ContentType;

        if (!string.IsNullOrEmpty(fileName))
        {
            fileExtension = Path.GetExtension(fileName);
            str_image = "MyPHOTO_" + numFiles.ToString() + fileExtension;
            string pathToSave = HttpContext.Current.Server.MapPath("~/MediaUploader/") + str_image;
            System.Drawing.Bitmap bmpPostedImage = new System.Drawing.Bitmap(file.InputStream);

            //ResizeMyImage method call
            System.Drawing.Image objImage = ResizeMyImage(bmpPostedImage, 200);
            objImage.Save(pathToSave, System.Drawing.Imaging.ImageFormat.Jpeg);
        }
    }
    context.Response.Write(str_image);
}
# jQuery : Dropzone Js implementation.
Here in dropzone Js javascript code, we set some properties and an event like `URL`,` success`,` error`,`maxFiles`.
- URL - Has to be specified on elements other than form (or when the form doesn't have an action attribute). You can also provide a function that will be called with files and must return the URL.
- addRemoveLinks - This will add a link to every file preview to remove or cancel (if already uploading) the file.
- maxFiles- if not null defines how many files this Dropzone handles.
- success - The file has been uploaded successfully. Gets the server response as a second argument.
- error - An error occurred. Receives the errorMessage as a second parameter and if the error was due to the XMLHttpRequest the XHR object as third.
Here the full list of dropzone Js events from dropzone Js official website.
On success method, we added a console message which shows the uploaded image name this is how dropzone gets server response .i.e dropzone JS get the file name.
$(document).ready(function () {
    Dropzone.autoDiscover = false;
    //Simple Dropzonejs
    $("#dZUpload").dropzone({
        url: "hn_SimpeFileUploader.ashx",
        maxFiles: 5,
        addRemoveLinks: true,
        success: function (file, response) {
            var imgName = response;
            file.previewElement.classList.add("dz-success");
            console.log("Successfully uploaded :" + imgName);
        },
        error: function (file, response) {
            file.previewElement.classList.add("dz-error");
        }
    });
});
Conclusion: Here in this article we learn how using DropzoneJs we can upload and resize file in Asp.net application.
You can also check these articles:
- An easy way to upload bulk images in Asp.net c#.
- Preview Image before uploads it with jQuery in Asp.net.
- Profile photo change with drag-drop with Dropzone Js in Asp.net C#.
Thank you for reading, pls keep visiting this blog and share this in your network. Also, I would love to hear your opinions down in the comments.
PS: If you found this content valuable and want to thank me? 👳 Buy Me a Coffee
Post Comment
Your email address will not be published. Required fields are marked *